Pinterest

Showing posts with label flowers. Show all posts

Monday, September 9, 2013

Helping Monarchs: Plant Your Own Milkweed


Over Labor Day Weekend, we enjoyed a great visit to a neighboring fair.
 One of my favorite exhibits there is a parks area where all kind of natural living is exhibited, everything from choosing a great hunting dog, making maple syrup, archery and wildlife shows.  This year we happened to attend a butterfly tagging workshop for Monarchs. Like many of you, I love butterflies and try to plant as many flower varieties as I can to attract them.  I found out that this year though, the butterfly population was way down.


I found out that it was because of two reasons.  The first is loss of habitat.  That of course is understandable because of cultivation, building, herbicides and so on.  The second is because our weather pattern in the northeast last year was very dry and it led to the lack of enough plant material to host the monarchs.  So, the weather last year affected the population this year, including the monarchs overwintering in Mexico.

The naturalist showing how to tag a monarch.

How do they know about the populations and where the monarchs travel?  It comes from the tagging program.  Basically tagging monarchs is putting an ID sticker on one of their wings which doesn't interfere with their flight and helps other naturalists to track the population and it's health. Who tags them?  Anyone who would like to... I'm in.  

Obviously not everyone wants to chase butterflies with a net and place a sticker on them, so how else can we help?

Butterfly Garden at the Nature Center Display

Well, that takes us back to the first problem facing the monarchs...loss of habitat.  This is an easy remedy.  There's only one plant the monarchs need as a host plant and this is milkweed.  Milkweed comes in many different species including, tropical, swamp, showy, purple, as well as common milkweed.  
Milkweed gets its name from the white latex type sap that comes when you break any part of the plant.  This sap must be milk to monarchs because it's their number one caterpillar food of choice!

One of two caterpillars we found at our community garden.

You can help the monarch by including Milkweed in your garden space.  We don't actually plant ours because as it is a weed, it comes up by itself.  We just let it some plants come up in our community garden space for the butterflies. Remember, common milkweed is a, well, a weed.  It will get very invasive if it's left to itself in fertile soil.  So, we keep some around but weed the rest.  
This year, we actually found some monarch caterpillars on our milkweed!  Not just one, mind you, but two bit fat caterpillars!  It's the best kind of nursery to have...we really did it by not interfering with nature's process too much.  Allow a few plants to grow and bloom and let the butterflies do the rest. 

This monarch caterpillar is just about ready to pupate!

Experts suggest if you would like to grow your own common milkweed, try planting it in pots so it doesn't get take over your garden or buy some more exotic varieties that aren't quite as vigorous to reproduce.  You can find some more info here.

As for us. we have found the perfect balance by letting it grow where it's already at and enjoy helping out these amazing butterfly wonders.  Here's hoping you can help you too.

First: Identify milkweed in your area or property and allow some to grow.
Second:  Purchase some special varieties of milkweed to grow in your garden space.
Third: Plant lots of flower varieties like zinnias, marigolds and echinacea to feed the mature butterflies.
Fourth: Limit your use of any herbicides or pesticides in your garden space to encourage these winged wonders.


Thanks for reading!!  To find out more about tagging Monarchs, go to http://monarchwatch.org/
to order tagging kits and nets.  Be blessed!

Have you noticed many Monarchs in your area? 


Linked to these amazing blog hops....Frugal Days, Sustainable Ways
Homestead Barn Hop 

Wednesday, July 3, 2013

Floral Flag


The Fourth of July brings an abundance of blooms and I couldn't resist featuring them here in my patriotic ode to Independence Day.  Not only are these flowers blooming right now, they also happen to be the colors of red, white and blue.

Bachelor's Buttons, an annual flower that is a true blue in the garden, represents the blue:  Feverfew, an herb known for helping to ease migraines, stands for the white and Monarda with it's spiky firecracker type petals proclaims the red of Old Glory.

Seems like even the flowers will be celebrating this day...

Happy Fourth and blessings!

Linked to these amazing blog parties... Farmgirl Friday
Wildcrafting Wednesday 

Tuesday, July 2, 2013

The Importance of Pollinators in Your Garden


 There's nothing like seeing lots of beautiful flowers and an overflowing garden of produce.  But what's the secret behind this fruitfulness?  That would be where pollinators come in.  Most flowering plants depend on bees, butterflies, animals (hummingbirds and bats) and even flies and wasps for pollination.  

What is pollination?  It's basically the act of moving pollen from the male stamen to the female stigma and fertilizing the plant which then causes it to set seed.  Insects and animals help to do this in your garden.  Pollinators are called "Keystone Species" because they are species on which other species depend.  In other words...if you want zucchini and tomatoes, you want pollinators.

Calendula flowers in the Garden

We need pollinators and they need our help.  "Pollinators are vital to maintaining healthy ecosystems.  They are essential for plant reproduction and produce genetic diversity in the plants they pollinate.  The more diverse plants are the better they can adapt to the changes in the environment."1


An Uncommon Black Parsley Swallowtail CaterpillarButterflies are pollinators too.

 How can we attract more pollinators to our gardens?  
This is a great question and fairly simple to do.  Many gardeners are doing it already without knowing it.  I know I began to learn about pollinators after watching them in action in different flower beds.

1. Plant a rich diversity of flowering plants in your flower beds and garden. 
 Seems like a simple plan but it does help to get some ideas by seeing which plants attract what insects in your garden.  I was able to observe this firsthand and found that mints are a huge pollinator attractor.  I mean huge.  It's worth planting some in a contained area just for this alone. Plant pollinating attracting plants in the garden around the vegetables too.  It will give the bees and other insects lots of pollen variety.

Also, by planting diverse plants and flowers, we are offering different sources of nectar (which of course attracts pollinators) and different bloom times which will provide food sources and pollen all season long.  Don't forget simple species such as marigolds and classic zinnias.  They are always drawing bees as well as butterflies to the garden.

This pollen-rich Sweet Alyssum attracts a pollinating fly.

2. Plant lots of native perennial and annual species. 
 Ever notice that some plants seem to have LOTS of activity around them?  These are the species you'll want to plant.  In the northeast United States, Echinacea, Bee Balm (Monarda), Gaillardia, Rudebeckias and daisies seem to be big attractors.  Don't forget herbs as well.  Lavender, thyme and mints are totally loved by bees and other insects alike.  I've even seen hummingbirds amongst my sage flowers drinking the nectar...who knew?

Pollinators include all kinds of bees and wasps.

 3. Don't use pesticides in your garden.  
This seems like the easiest step to help out the pollinators...no spraying.  I try to garden and plant vegetables and plants that are very insect resistant.  If it's very fussy...I won't grow it.  If I do ever spray, I use a plant-based biodegradable spray that will break down eventually.  Also spraying on a non-windy day helps.  I prefer to rarely use any kind of spray though and will hand pick offending insects whenever possible. 

Flowers that have an open petal face are great landing spaces for pollinators including butterflies.

Habitat loss is one reason for the decline of bees and other insects. So no matter what size space you have, you can plant for the pollinators!  A container full of lush zinnias or herbs will create a great resource for them and give them some fast food on their journey.

Planting with pollinators in mind is a win-win situation.  You'll be creating a safe micro-environment for them and they will be happily pollinating all your vegetable plants and flowers - perfect.

Blessings!

What plant attracts pollinators the most in your garden?

1. http://www.fs.fed.us/r9/wildlife/plants_botany/docs/National_Pollination_v3.pdf


Linked to these amazing blog parties...Frugal Days, Sustainable Ways
Farmgirl Friday Wildcrafting Wednesday
Natural Living Link-Up Frugal Days, Sustainable Ways
From the Farm Blog 
Homestead Barn Hop 

Tuesday, May 28, 2013

Why You Need to Grow Chives


Chives...kids seem to love them.  Maybe because it's like eating grass except it tastes better. I'm not sure what it is, but I know our boys liked them and my seven year old nephew loves them too.  It's the one of the herbs you can eat right away like a food, unlike some of the stronger flavored herbs.  After eating them outside, I would send the boys over to the parsley patch and have them eat a few leaves to help kill the onion odor.  I called it the "parsley chaser."

And if you enjoy onions; you'll really like chives.  These hollow tubes of onion-ness are sure to please the gourmet in all of us.  Here are a few reasons why you'll want to include them in your herbal garden...
 

1. Chives are Ridiculously Easy to Grow.  
I personally think this is always a great reason to grow something.  If it's easy and grows well, it makes us look like a garden genius (which is always good!)  Seriously, it is easy to grow and virtually maintenance-free.  It's equally easy to grow by seed or by division.  I've done both.  If you don't dead-head the flowers, you'll have lots of chive seeds and new plants next year.  When you do plant them, it's good to give them some space to spread out because they will.  Not obnoxiously, but will reliably spread over time. 

 Buy seeds at the store or online.  Find the plants at a nursery, or better yet from a friend.  Plant the herbs or sow the seeds in a sunny location or part shade (although I have some in quite a bit of shade and they still do well) and water when needed.  You can also start the seeds indoors earlier if you want.  Chives grow to about 12 inches in height and you will want to think about dividing them every 3-4 years to prevent any root disease.  I have to be honest in saying I have never divided one patch and my container plant I only transplanted twice and haven't had any problems....these little guys are hardy.


2. They Make Excellent Container Plants. 
 I have a large pot of chives right outside my side door.  What makes this great is that they are a few steps away when I'm cooking.  I don't have to weed them, feed them, or baby them.  They are perfectly happy in their little home.  I started with a medium sized garden pot, probably a 12 inch and moved up to the next size (transplanted) some years later when I could tell they were very pot bound.  

When you want to harvest them, just grab a handful of them and cut them close to the roots.  I leave about a half inch to an inch behind.  They will quickly regrow in no time.  In fact, it's reinvigorates them when they are harvested so don't be shy about using them...they like it.


3. They Grow Beautiful Flowers.
Even if you don't like onions or chives, they are so worth growing for the purple flowers in spring.  I have a large stand of them in my front yard and I absolutely love them.  The bees love them too...another eco-bonus for your landscape.  As a matter of fact, there are different alliums which are grown entirely for their flower.  I know because I've bought them over the years.  Having an edible landscape/flower garden is a win-win idea. Let these flowers dry on the plant to collect the small black seeds.  They are small but easily recognizable.  You can use these seeds to start new plants indoors over the fall.  Chives need a dormancy period so it's best to grow new plants for winter as your summer grown plants will need the winter to rest.  

I love to use the flowers in salads and as garnishes by pulling apart the individual florets.  You can also make Chive Blossom Vinegar with them and use the vinegar for salad dressings and marinades.  
 

4. Chives Do Have Some Surprising Health Benefits!                                                                 
These little onions are called alliums because they contain "allicin" the compound that garlicand regular onions are known for.  Allicin is known to help reduce cholesterol and also is known for its anti-bacterial, anti-viral and anti-fungal properties. 

Chives also contain more Vitamin A than any other allium relative."100 g of fresh leaves contain 4353 IU of vitamin-A or 145% of daily recommended levels." 1     

                                                   
" In addition, the green leaves contain
other flavonoid-phenolic antioxidants such as carotenes, zea-xanthin, and lutein. Together, these compounds offer the human body protect from lung and oral cavity cancers." 2  


These little strands of green goodness really pack a punch when it comes to flavor AND health benefits.  Not too shabby for this modest and easy to grow perennial herb you're sure to enjoy.

How do you use Chives?

Use the leaves of this plant by harvesting and chopping them into small pieces.  I use chives to top every meal I make including soups and stews.  They lose their flavor with cooking so it's best to use them fresh at all times.  They also don't dry well.  I've found the best way to preserve them is by making them into an herb butter.  All you need is a stick of softened butter and chopped chives.  Add as many or as little as you like.  Stir to combine well and shape into a roll on a piece of waxed paper, roll to close tightly, wrap in plastic and freeze in an airtight container.  When using, let the log thaw gently and cut into little coins to serve.  Yum...delicious! 

That's all folks.  Chives...an herbal garden hero.  Blessings!


References:
1.http://www.nutrition-and-you.com/chives.html
2. Ibid.
Additional Source:
http://www.livestrong.com/article/407900-health-benefits-of-chives/

Linked to these amazing blog parties...
Frugal Days, Sustainable Ways
Seasonal Celebration Wednesday
Monday's Homestead Barn Hop
Farmgirl Friday Blog Hop


Friday, May 24, 2013

The Last of Spring's Blossoms


Our weather has been crazier than average over the last week especially.  Temperatures in the 80's even coming close to 90 degrees finalized all the blooming trees and some flowers before they were forced to succumb to the heat.  However, I happened to grab my camera before taking a quick walk around the neighborhood before this heat wave occurred.  So I was able to bring the blooming part of spring - minus the allergies - back again.   Not as beautiful as the real thing, but the pictures still speak 1000 words. :)

The whole tree is beautiful, but a single bloom is a work of art.

I really love the color blue in nature and these flowers were brilliant!

These blooms remind me of those tissue flowers we used to make as kids.

Wild violets are one of those things that make you look twice...gorgeous little creatures.

I had to take a picture of the amazing pink buds of this white rhododendron.

The opened flower buds fade into white.
Happy Spring to you all!  Blessings!

Linked to these amazing blog parties... Weekly Top Shot
I Heart Macro Hello Mondays
The Backyard Farming Connection Hop Frugal Days, Sustainable Ways
Seasonal Celebration Wednesday Monday's Homestead Barn Hop

Tuesday, April 23, 2013

How to Plant a Cottage-Style Window Box


What brings to mind the cozy look of a cottage more than a window box?  At least that's what I thought when we first moved into our small cottage-esque starter home so many years ago.  While our house is not quaint or very special on its own, adding a large custom built window box made it feel more like the cottage inspired home and garden we were looking for.
  

My love of the cottage look is in the small collection of flower beds surrounding our home.  I define cottage-style as a loose, informal grouping of classic annual flowers reminiscent of times gone by.  I don't stick with any strict rules that they have to be cottage flowers, but it's more of an unconstrained, informal type planting.  No orderly plantings here, but only what feels like you would find in a field of wildflowers.  So here is some loose guidelines for you to plant your own amazing cottage style window box.


1. Start with a great loose soil that is has potting soil and a mix of perilite, vermiculite or other soil lightener. 
Great soil is always key when container planting.  You want something that has good drainage, is light yet is able to retain enough moisture that you don't have to water constantly.  I have to admit I reuse my soil year after year and freshen it up with every new planting.  I've yet to have any problems with soil disease (thankfully) and it has saved me lots of $$$.  You can decide if you want to do this...the flowers I plant are very hardy and as you can see, it doesn't affect their growth. 
 

 2. Choose plants that are tall, medium and spreading.
Here I have Tall Ageratum in the back, Black and Blue Salvia in the middle section alone.  I also have Zinnia "White Profusion" on the ends with begonias tucked in here and there for a shot of bright color.
This is basic when planting a one sided container.  Tall growers in the back and medium or spreading plants in the front depending on the growing space in your box.  It's important to use "untidy" flowers in order to get that free form cottage look.  Really read your flower labels and check out other planters in the garden center to get ideas from what they've created.  Don't be afraid to ask them what plants they used when you find something you like.
  

3. Try to use some unusual or uncommon flowers in your box and fill in with less expensive flowers.
The salvias are a bit pricey, but I find I only need two of them to fill out the box.  They grow quickly and I don't have to wait long for the box itself to become lush with flowers.  I like to buy flats of other easy to grow and common flowers to use in the box and my other containers.
I also like to "overplant" my flowers in order to get them to fill in quickly.  I can do this when the flowers aren't overly expensive.  Impatiens and begonias are flower varieties that fill out quickly and are great for shade.   


4. Look for butterfly and hummingbird flower varieties.
The salvia I use every year because they attract hummingbirds like crazy.  I would much rather plant flowers to attract them than use feeders as I don't want to keep up the feeders.  I know it sounds lazy, but what can I say...I'm being honest!
These salvia get quite tall and the first year I planted them I was embarrassed by their height.  However, once the hummingbirds came, I was all about these beauties.  By planting such tall flowers, I have a great view of them AND the wildlife from inside the house. The ageratum and zinnia attract lots of butterflies too.


5. Be sure to use a long term fertilizer followed by a liquid fertilizer. 
This is essential for a beautiful window box.  Fertilize ( I use an organic one) and water daily once summer's heat hits. My early flower box plantings were less than impressive until I talked to a friend who had a beautiful box.  I asked her the secret and she said to fertilize it.  Simple enough but so important to get that lush growth and amazing blooms that make your garden really stand out.


That's it.  Nothing too complicated but so wonderful to look at.  My favorite thing to plant every year is our double window flower box.  I always like to imagine what it will look like year after year as I tend to experiment with flower choices (except the salvia).  

Hope this inspires you to be creative this year with your plantings.  Have fun!  

What's your favorite cottage -style flower?

For more on flower plantings, check out my post...Container Plant How-To's

Blessings!

Simple Lives Thursday


Linked to these amazing blog parties... Empty Your Archive
Waste Not Want Not Wednesday Seasonal Celebration Wednesdays
Wildcrafting Wednesdays Frugal Days, Sustainable Ways
Simple Lives Thursday Homestead Barn Hop
Farmgirl Friday 

Friday, April 19, 2013

April Flower Collage


Hellebore

Spring's arrival is more than just a date on the calender It may be official on paper but we really need to experience it in order for us to understand what it really is.  The warm sunshine, refreshing rains and of course its profusion of spring flowers.

Hyacinth - bud and flower

 We finally have had breakthrough in our endless winter here with warm temperatures bringing up all the spring bulbs and putting on a pretty amazing show.  Totally soothing to this snow-weary soul...
 
Spring in April - 2013

Spring is a promise come true and a herald of new beginnings...may all your promises come true and new beginnings be sweet. 

Blessings!

Linked to these amazing blog parties... Weekly Top Shot
Homestead Barn Hop Hello Mondays
Natural Living Mondays
Seasonal Celebration Wednesdays Wildcrafting Wednesdays
Frugal Days, Sustainable Ways Simple Lives Thursday
Farmgirl Friday 

Tuesday, April 16, 2013

Container Plant How-to's


Whenever I'm looking for a burst of color in a sea of gray pavement, nothing does the trick of filling out a space like container plants.  They are colorful and mobile and bring life to an otherwise boring spot in the yard.
I've been growing flowers in pots for years now and learn something new every year.  I've really settled on flowers that I love and always look in gardening catalogs for new inspiration with different color and plant combinations.  
If you're considering making your own flower containers this year, it's good to know some basic information in order to have the best flower display all summer long.


 1. Know your location.

 Is your spot shady?  Full sun?  Windy? Sheltered?  These are all important things to know when considering what plants to choose for your containers.  Place an empty pot in the spot you're looking to plant and get a general idea of the sun/shade conditions.  I tend to go with plants that can tolerate sun/part shade as I have mostly an eastern exposure with some later afternoon sun.  
Is the spot near a easy water source?  Locating pots far away from easy watering is an invitation to dead plants.  My pots are always located close to an outside rain barrel or indoor water source.  
Is the spot in a hot,  non sheltered location? You may also want to consider using a self-watering planter and plants that are good with hot sun for 6-8 hours.  This will limit your flower choices but it's so important to plant to your location for the best results.


2. Make sure to pick great soil and use the best pots. 

I like to make my own potting mix blend.  I generally use a bag of great basic potting soil, a bag or two of vermiculite or perlite, and a bag of peat moss.  I don't like watering plants twice a day so I tend to use half soil and half of a soil lightener to get a great mix.  I try to use a bit less soil in the hanging plants so they aren't so heavy but enough soil so one watering will be good for them.  
I like plastic pots the best.  I do have a terra cotta pot I use, but I have to keep it in standing water as it dries out way too fast.  Plastic is light, moisture retentive, easy to store and reusable year after year.  Porcelain is nice too, but is heavy and can't be kept out all winter as it will crack.   


3. Pick the flowers and plants that will work best for your containers.

You will want to choose the best flowers for your sun/shade location and ones that will give you continuous color all season long.   I have gone back and forth with flower choices over the years to figure out what works best for us.  I like pinks, blues and purples the most, but have found my tastes have evolved as I discovered certain flowers just didn't handle the long bloom season.  Like the "Wave" series of petunias would be beautiful for a month or so but would really burn out by mid-summer.  I would have to pinch them way back and wait for them to rebloom.  It didn't work for me because I want color all the time...all season.  The flowers in the photo above are excellent in containers giving me great color all season, holding their color, not needing deadheading, can handle dry conditions and are generally hardy.  Some are old fashioned, like begonias and coleus, but they are beautiful and last a long time.  Don't forget to add non-flowering plants like coleus, caladium bulbs and even herbs to your collection.
You may want to plant the same kind of flowers all in one pot when placing the pots in a large display.  Some plants are more vigorous and will overtake another plant.  Try to find out what the flowers growing habits are before putting them together.  I solved this problem by planting the same flower varieties in the same pot and then placing the pots all together.  It also helped me to see what plants were more aggressive.  Always check the growth size of your plants as well.  Taller plants will always overtake the shorter varieties.


4. "Overplant" your flowers and fertilize with a long 
 season fertilizer as well as weekly feedings.

You will want to plant as many flowers in a pot in order to get the pot to be lush and overflowing.  This is the one time you can ignore the little tags as to flower spacing and "crowd" your container with flowers. I figured this out after buying different hanging flowers pots.  After the growing season, I noticed they overfilled their containers with plants.  By doing this, your pots will fill out quickly with foliage and eventually blooms instead of waiting the whole growing season for this look, you can achieve it much faster by overplanting.
Fertilize, fertilize and fertilize!!  I use an organic 2 month granular fertilizer as well as an organic weekly or monthly one.  This will keep all the blooms nice and healthy and solves the problem of the overplanted container.  As long as you water and fertilizer consistently, you're sure to have beautiful blooms.

This is the basic information that I have discovered along the way and I continue to learn more as I experiment with different flowers and plant combinations.  Planting your own containers is a great way to express your own creativity and to create your own floral space.  

What are some of your favorite flower combinations?  Blessings!


Linked to these amazing blog parties...Waste Not, Want Not Wednesdays
Frugal Days, Sustainable Ways Wildcrafting Wednesday
Farmgirl Friday Homestead Barn Hop
Tuesdays with a Twist Empty Your Archives
Seasonal Celebration Wednesdays Simple Lives Thursday


Friday, March 1, 2013

Photo Fun with Flowers


I am an obvious flower fan.  I really can't help it.  They are gorgeous and if I were able to have them in every room, I would.  So, I content myself with growing them outside in the summer where I can see them every day.

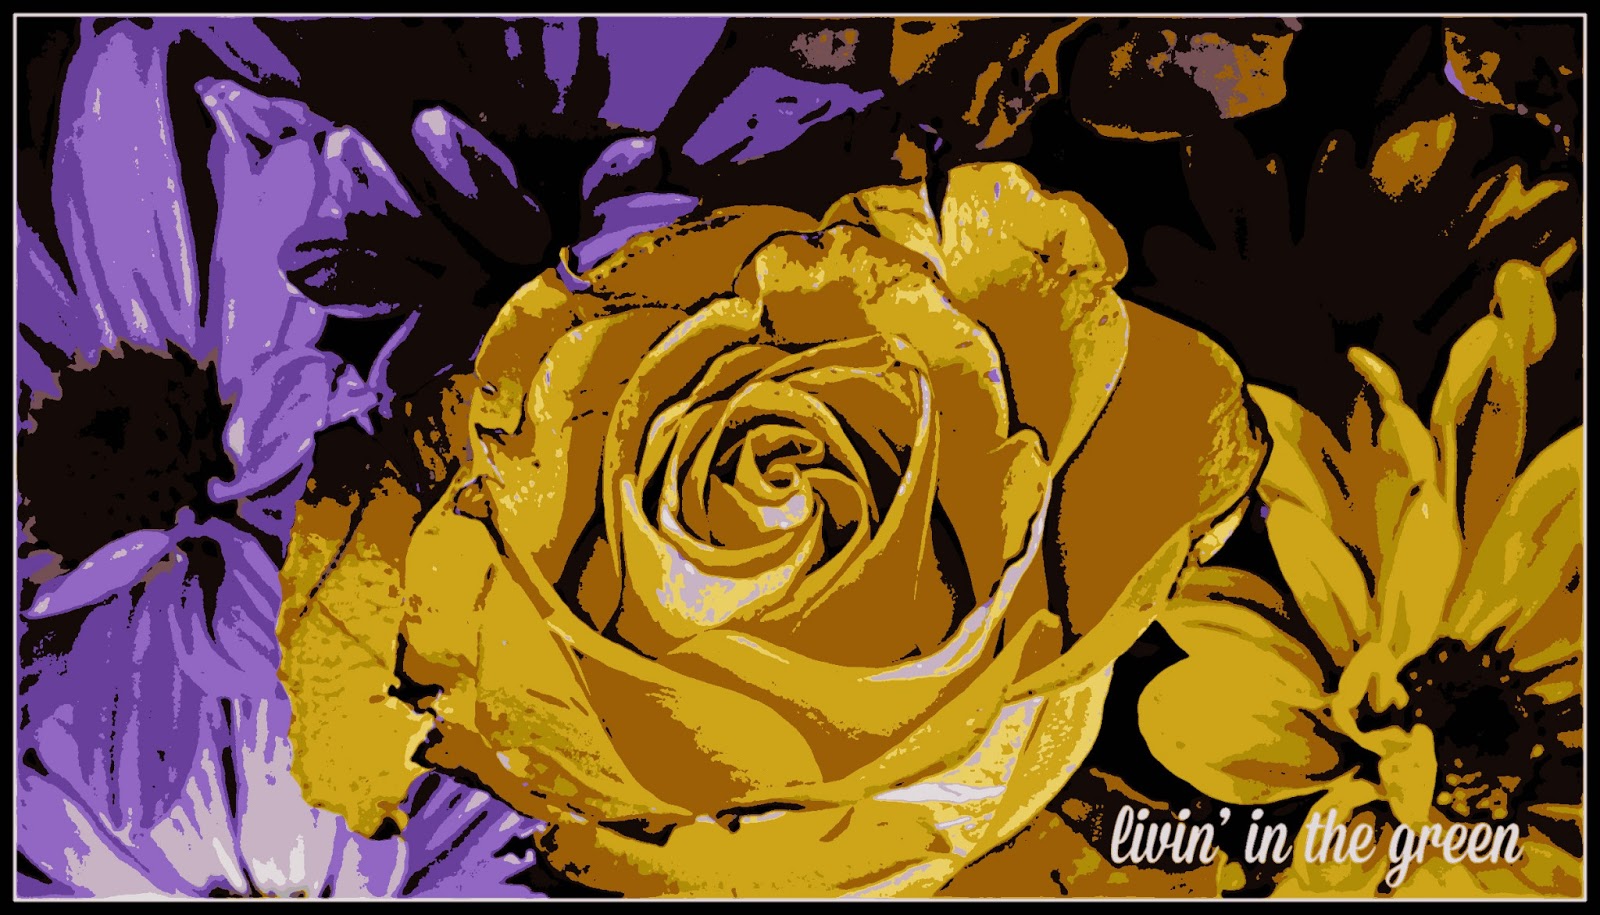
I thought I would have fun with this photo my son took with his Panasonic GH2 of some cut flowers I brought home one day.   Here's his original photo above.


Here's one where I softened it up a bit and added more color and a bit more contrast...


Here's the last one with a "poster-izing" effect.  It's really modern and a completely different look from the original photo.  

Just a bit of fun with flowers.

Linked to these amazing blog hops: Weekly Top Shot Homestead Barn Hop
Hello Monday The Backyard Farming Connection
Frugal Days, Sustainable Ways 
 Seasonal Celebration Wednesday
Wildcrafting Wednesday The Homeacre Hop
Simple Lives Thursdays Farm Girl Blog Fest