Sunday, December 30, 2012

Pressure Cookers: A Kitchen Classic Basic

(Photo Source)
Some of my first cooking memories as a child are of a loud hissing noise emanating from my mom's little kitchen.  This was usually on a weekend when mom's Roast Beef Dinner with Potatoes and Carrots were usually   oursundaydinnermenun    .I remember my first Christmas being married.  One of the top three items on my wish list was for a pressure cooker.  I wanted one REALLY bad and I must have told a lot of people because I ended up getting two that year.  No problem.  My sister got two waffle makers, so we each swapped our extra appliances.  Perfect.

I used that little cooker for a LONG time.  It was perfect for the two of us as I was working full time and it was a fast way to cook a small roast when I got home from a long day.  I actually still have it even though it's a few decades old now.  I went on to buy a 12 quart pressure cooker too.  I use that almost exclusively for canning, but I did use it different times when I was cooking a roast beef dinner for a lot of people.  

What's so great about pressure cooking? 

1) It's first and foremost advantage is its ability to cook fast...really fast.  How about cutting down on the cooking time from 3 hours to 1 hour?  That's right.  It can cut cooking time by 1/3 on many recipes. Why is that an advantage?  Well, knowing that you're food will turn out well and cook fast easy makes cooking at home an advantage.  Especially if you're working full time or just busy in general.  It makes meal planning a bit easier too.  You don't have to start a meal 6-8 hours in advance when you're too busy to plan on what's for supper.  I love my crockpot too, but it definitely takes thought to get a meal together when you slow cook.

2) It's my favorite way to cook dried beans.  
Cooking dried beans in a pressure cooker is a dream!  I actually purchased my latest pressure cooker (electric) with cooking beans in mind.  It's so fast and easy and of course, so much better and economical than a can of salted canned beans.  I also like the idea of being able to store lots of dried beans in the pantry with rice.  They're great to have on hand.  (Read my post, 3 Fool-Proof Ways to Cook Dried Beans.

3) It's a great way to cook leaner cuts of meat which means saving $$$.
Go ahead and buy those round steaks and roasts.  I love my crockpot and they do a nice job of cooking, but if I'm short on time...my pressure cooker comes to the rescue!  My sister made a roast beef dinner complete with carrots and potatoes for her family and hungry guests in an hour.  With this kind of efficiency; it;s time to "watch out Rachel Ray, this could be the new 30 60 minute meal sensation!"  Also, if you tend to cook game meat, especially tough cuts of venison, a pressure cooker does a great job tenderizing the meat.

4) A pressure cooker is an excellent way to make quick quality broth/stock.
I was reading a few articles online about making stock with a pressure cooker.  Chefs do this in the kitchen and a recipe for it is in my pressure cooker cooking guide.  It takes about an hour...wow.  I've actually made soup up in a hurry by using the pressure cooker.  

How about the nutritional aspect of pressure cooking? 
A great question to be sure. Even though some vitamins are lost during cooking, the amount of vitamins lost is the same as standard cooking.  And if you consume the cooking liquid, you will regain some of the lost nutrients. According to this Eating Well  online article, "In the case of grains and legumes, although the vitamins and heat-sensitive vitamins and phytonutrients are vulnerable to deterioration, the net result of pressure-cooking is a positive nutritional gain—from the increased digestibility of the macronutrients (protein, fiber and starch) and the increased bioavailability of the essential minerals."  In other words, the beans are actually more easily digested with less "beanly" side effects.

What kind of pressure cooker works for you?
There are so many models to choose from and nowadays they are so much easier to use.  I have an electric model (my latest purchase) and I can put pinto beans in DRY and have them come out fully cooked within 40 minutes!!!  It's miraculous!  I am pretty in "love" with the electric version.  It sautes, browns, warms, and automatically shuts down when finished.  It also doesn't make any noise.  Seriously.  It's a great pressure cooker to start off with as it is so easy to use.  
My one tip?  Get the largest capacity pressure cooker you can afford (mine was under $90.)  You'll want to be able to cook up enough for the family and have extras.  

You may find a pressure cooker at a yard sale.  If you do and it's an old model, make sure you have an instruction book so you can buy a new gasket, and release valve for your cooker.  On my old models, there are only three parts that would need replacing.  The gasket is a rubber seal that can get cracked, brittle or stretched out if too old.  I would suggest asking someone who knows about pressure cookers before purchasing an old one.  Unless the one you find is still in its box and looks new.  These older models are a little trickier to use but if you are patient, completely fine.  I personally love the electric model and plan on keeping this version busy in the kitchen!


This is my electric pressure cooker...LOVE!!
There you have it.  I've come a long way (over 20 years!) since my first Mirro pressure cooker.  And I can't think of getting through my homemaking years without it.  I hope this helps you to make up your mind about this very valuable basic appliance.  It's a bit of an investment, but if you're into cooking, it's definitely an item you'll want to consider.

What are your experiences with a pressure cooker?

Blessings! 

Linked to these amazing blog hops... Living Green Tuesdays 
Waste Not, Want Not Wednesdays  
Frugal Days, Sustainable Ways 
Full Plate Thursdays 
Farmgirl Friday 
Backyard Farming Connection 
Wildcrafting Wednesday
Homestead Barn Hop


Friday, December 21, 2012

Here's a Christmas Word for You...


Words are so powerful.  They can build you up or tear you down.  They can inspire or destroy, soothe or inflame, encourage or deflate.  Words are integral to who we are.  We need words and communication.   As this season of great words comes quickly upon us, I want to leave you with some inspiring words...words to bring life and encouragement to you all.


 You are amazing and unique!  Full of creativity and passion.  Sending lots of joy your way as you discover more of who you are and everything you have to give to this wonderful world.


 You are full of love and hope.  You inspire others with all you have to offer.  Your acts of kindness to others is a reflection of our Creator.  You are wonderful!


You carry happiness.  You are a peacemaker.  You bring hope to many others.


Sending you lots of great words for a wonderful Christmas day and a year full of love, blessings and favor.  

Thanks for being a part of this world and sharing who you are...blessings and happiest of all holidays to you!


Shared with these amazing blog parties:  Small Footprint Friday ,  
InstaFriday  
Farmgirl Friday Blog Hop
Weekly Top Shot


Monday, December 17, 2012

3 Fool-Proof Ways to Cook Dried Beans


Cold weather in our area means lots of soups and stews featuring pintos, black, limas, garbanzos, navy and great northern beansYep, lots of beans.  But having incorporated lots of these protein rich gems into our diet, I had to rethink the can and visit the world of dried beans. After all, when you cook your own beans, they are much more economical AND you control the amount of sodium that is in them.  I tend to use a light salt (half salt and half potassium) to control the amount of sodium.  You have no choice when buying the canned beans.
But how do you cook them so they are firm and meaty, not mushy or too crunchy?  A great question, and one I'm here to talk about.  I love cooking dried beans and once you master a few basic methods and understand how they cook, it's easy to produce large amounts of beans to cook with and extra to freeze.  Remember, lentils and split peas have short cooking times and don't require pre-soaking, so this post will be about pintos, black and large limas.


 Let's start with a few dried bean basics.  First of all, make sure to rinse your beans well and sort through them.  I have actually found bits of debris that I would NOT want to eat so you won't want to skip this step!.The actual cooking part it pretty easy and I've found three foolproof ways to cook them that work well and which one you choose depends on how much time you have, what equipment you own and how much you want to make.  They all work well and have their advantages.  So I encourage you to try the easiest one for you. 

#1 Long-soaking Method Stovetop:  This involves thinking ahead so you'll want to clean your beans and then measure out how many cups of beans you'll be needing.  You will get about 3 cups of cooked beans from 1 cup of dried.  When cooking beans this way, it makes sense to cook a large batch.  Some to use now and some to freeze for later as they freeze quite well.  The larger the beans (like the large limas) will require longer soaking times. Large lima beans can soak for up to 24 hours. When soaking for extended amount of time, make sure to change the water several times so it doesn't ferment.  Adding a tsp of salt  per pound of beans to the soaking water will help the skins hold their shape and promote more even cooking.   By soaking the beans ahead of time, it will cut the cooking time, ensure even cooking and helps to remove indigestible "oligosaccharides" which are gas producing.  I usually do this the night before and drain the beans in the morning and put in a non-reactive aluminum pan.  Cover with water so it's an inch above the beans.  DO NOT add salt OR tomato sauce OR vinegar at this time.  This will inhibit the beans from absorbing the much needed water.  You CAN add a variety of herbs at this time though.  I like to add a mix of sage, rosemary and thyme.  If you have the herb savory, this also tastes pretty great.  If definitely gives the beans more flavor.  Boil the beans for the first 10 minutes and then turn down the heat to simmer.  This can take 1-2 hours.  I find that it actually takes an average of an hour and a half.  Add any acidic ingredients only AFTER the beans are almost tender.  Stir the beans gently with a wooden spoon to prevent the beans from breaking apart.  Make sure they are always covered with water as well.  You can salt the beans halfway through the cooking time, their skins should be soft enough to absorb the salt.  Allow the beans to cool at least partially in their cooking liquid before draining them.
I like this method when I need to make lots of beans as I can use a large pan for them.  


#2 Using a Slow Cooker: Where would we be without one of these most practical kitchen appliances?  Cooking dried beans in them is another great use for this Americana classic. Follow the long soaking or quick soak method* and cook your beans on low heat overnight or all day.  If you're at work, you will come home to some great cooked beans ready to use.  My crockpot gets really hot on the low setting, so my beans are done much sooner.  You'll want to experiment a bit with your cooker to know how long it takes to cook.  I just check them periodically to see how close they are to being done.  You can only make as many beans as your slow cooker can hold, so this method is good for small to medium sized batches..
  

#3 Using a Pressure Cooker:  This is by far and away my most favorite way to quick cook beans.  How to cook your beans will depend upon your cookers instructions, but here are a few pluses.  You can use a *quick soak method by putting your beans in a saucepan, bring it to a boil for about 2 minutes and then remove from heat, cover and let sit for an hour.  Make sure to drain and rinse beans before final cooking.  I have an electric pressure cooker that I use primarily for beans.  I tend to cook my beans in less time then is suggested in the pressure cooker guide.  I'll be putting the beans in chili or soup, so if they aren't quite done they can finish cooking there.  I would rather under-cook the beans just a tad than to overcook them and see them turn to mush.  With my electric pressure cooker, I don't even have to pre-soak the beans at all.  This is invaluable when I want to make dinner and make it fast!  This makes the smallest amount of beans for me, so I use this method when I'm in a hurry.

The Five Bean Test: Use this test when cooking on the stove or in the crockpot.  I saw this little tip on a Food Network show and it's great.  Since the beans don't always cook at the same rate, take your wooden spoon and gather 5 beans from different places in the pot.  Blow on the beans and if the skin wrinkles on all the beans, then they are usually done.  You'll also want to eat them to make sure they're not chewy.  

Add-ins: Remember, in order to give your beans great flavor, try adding herbs (be creative), onion, garlic for a vegetarian option.  You can also use pork ribs, smoked pig's feet, bacon, and those leftover ham bones from Christmas or Easter.  I generally only season beans with meat when they'll be in a non-chili dish.  Otherwise, I use tomatoes and greens to give them great flavor. 

Well, that's the scoop.  There are a few more ways to cook beans, especially if you're making Boston Baked Beans and the like.  But this will get you started on the successful road to making great cooked beans every time.  

One more tip: I freeze my extra beans in a quart bag for one recipe of chili.  Make sure to use your cooking water as well.  It has nutrients in it as well and I often add it to our chilis. I usually freeze the water in with the beans and they turn out well.  I often use 3 cups of beans for one batch of chili or soup.

Hope this helps! For a great book all about dried legumes...check out "Beans" by Aliza Green.  I found it at our local library and bought a used copy on Amazon.  It has some great general cooking info as well as lots of recipes!

What's your favorite way to cook dried beans?

Shared with these amazing blog parties: Backyard Farming Connection
Frugal Days, Sustainable Ways  
Full Plate Thursdays 
Small Footprint Friday 
Farmgirl Friday 
Waste Not, Want Not Wednesdays 

Tuesday, December 11, 2012

Christmas Garden Inspirations...

Well, it unfortunately does not look too Christmas-y around here which is unusual for us...the weather outside is definitely not frightful.  Not that I'm complaining too muchHaving no garage means extra time cleaning off snowy cars.  However, snow does help to make the season feel festive.  But if I can't see some of the white stuff, then seeing some green and red make my season cheery and bright.  So I searched the web for some of the most beautiful Christmas garden displays I could find that would inspire visions of sugar plum fairies, or at least would help to satisfy the gardener "fairy" in all of us.

From conservatories to a nursery display to a Las Vegas style garden...these pictures capture a little bit of everything.  So grab your cup of favorite hot cocoa and take a quick trip to see some truly beautiful gardens without leaving your own chair...

W. W. Seymour Conservatory in Tacoma
 Our first stop is to a conservatory in Tacoma, Washington.  Built in 1908 as a gift from W.W. Seymour, during the time when conservatories were wildly popular, they really know how to deck the halls for a beautiful floral display that'll leave you seein' red.  I love how they blended in the narcissus with the poinsettias in this photo.  I can't imagine not feeling a sense of refreshment after taking a stroll down this little lane.

Conservatory in Tacoma

 There is so much to inspire here.  I love this mix and it could easily be reproduced in a smaller setting at home.  This is definitely Pinterest worthy.


Callaway Gardens

Now if we head on down south, to Georgia that is, we'll find another beautiful conservatory.  Open in 1952, "Callaway Gardens is nestled in the southernmost foothills of the Appalachian Mountains." (sourceI can't even imagine putting together this poinsettia tree, but I'm glad they have gardeners that don't mind doing the work.  I love the idea of the lawn inside too.  Very nice.


Phipps Conservatory

 Going back north, we stop at Pittsburgh to visit the Phipps Conservatory to check out their display.  This one was built in 1893 by Henry Phipps as a gift to Pittsburgh.  Nice gift...I wouldn't mind a small one I think!  I'm not sure what plant they lined the flower beds with, but they're perfect! The paths in this picture make me think this display was designed for the kids.  I can only imagine them running all around the paths...fun.  Check out more info here.


Phipp's Conservatory in Christmas


 The Christmas tree lit up in this photo is absolutely stunning!  This is definitely walking in a Christmas wonderland.


Cactus Light Display


Now this is making the most of what you have and I love the creativity.  Who needs snow or poinsettias to get into the Christmas spirit here?  "One of the best Christmas light display takes places at the Ethel M’s Cactus Garden in Las Vegas -  over half a million twinkling lights are put up! Each year, the cactus garden, at 2 Cactus Drive, decorates over 300 species of plants with Christmas lights."  Love.  Las Vegas Style Christmas.

Christmas Florals at a Gardener's Center

I have this photo here because you can find inspiration in a greenhouse too.  Like these croton houseplants mixed in with poinsettias.  This is fun and so cheery.  Hats off to a creative designer.

Longwood Gardens Christmas Display

I saved my favorite picture for last.  This "take-your-breath-away" display is downright beautiful.  Just give me a hammock so I can live here please.  I can't tell from the photo all the plants they used, but it looks like moss and ferns are included in this eye stunning creation.  It's "garden meets Christmas" at its finest and I think it's pretty spectacular!  This garden is located in Kennett Square, PA.  So if you're in the neighborhood, here's a place that screams "Christmas Cheer" to the fourth degree.  Pretty amazing stuff.  More information here.

Well, that's the tour.  I hope you enjoyed it as much as I did.  I now have a new list of a few places to go and see and get a chance to breath in that Christmas spirit.  Blessings!

Shared with these amazing blog parties: Frugal Days, Sustainable Ways  
Seasonal Celebration Wednesdays  
Wildcrafting Wednesdays
Wicked Good Wednesdays
Waste Not, Want Not Wednesdays 
Homestead Revival 
Hello Monday 
Clever Chicks 

Saturday, December 8, 2012

Peppermint: An Essential Herb


If there is one herb that gains world wide attention at this time of the year it would have to be the ever refreshing herb peppermint.  Its name alone is plastered on tons of products from candy canes to Peppermint Lattes.  But most of us don't envision the nice green plant on your screen but rather a red and white candy stick.  No problem.  Peppermint is only too happy to share it's intensely rich menthol oil in candies, breath mints and ice cream.  But don't relegate this valuable herb to the dessert table only; it's health benefits are numerous and make this a valuable plant for the garden.


Let's go over some ways that peppermint is great for you.  "Peppermint oil comprises vitamins A and C, omega-3 fatty acids, and minerals including potassium, manganese, iron, magnesium, calcium, and copper. The numerous health benefits of peppermint oil include its ability to treat several health problems. "(source)
What this translates to is that peppermint is said to cure indigestion as well as a few other conditions.  For indigestion, a good old cup of peppermint tea after dinner will help with this.  If you don't have tea, then a few drops of oil in some water will do this too.  Peppermint is also able to dispel gas, help with stomach spasms and great overall for general stomach upsets.  It's also being studied for its effects on Irritable Bowel Syndrome.  Hmmm, wonder if this is why most stomach aids have a peppermint flavor?


Peppermint also helps the respiratory system.  It acts as an expectorant to help clear the respiratory tract.  It can also help with sinusitis, asthma and bronchitis.  A good strong cup of English Breakfast tea with peppermint leaves would be a huge help with opening up the lung passages for easier breathing.  In our family, my husband Todd would use this to help with any congestion he may have due to colds or asthma.  The caffeine in the black tea (or coffee) is a bronchodilator.
Just the aroma of a hot cup of peppermint tea can help relieve stress, headaches and help with colds.  That's one amazing cup of tea!  So how do you grow this worthy garden plant? 
Well, mints are generally unfussy plants to grow.  They can handle part shade and mine actually prefer to be in filtered sun or sheltered during late afternoon heat.  I also find that they like the ground fairly moist.  Mint does spread so I have my drinking peppermints in pots.  Peppermint is not nearly as invasive as some of the other mint varieties, but it's hard to remove once it's established.  Besides my potted mints, I have peppermint in the garden that I've been growing for over a decade.  I don't use it for anything except for the bees.  They love mint and I don't let my potted mint flower.  If it does, it tends to send forth seed that is mixed with other mints and it loses it's pure flavor. To keep the flavor pure, trim off any flowers so the plants can't set seed.  They will continue to propagate underground via their root system.  I've been growing an intensely flavored peppermint as well as chocolate mint and they have held onto their delicious oils using this method.

Dried peppermint leaves

Mints can also handle being indoors on a window sill.  As long as they have some sunlight, you'll be able to get some delicious fresh leaves to use as tea or to add to some desserts.  You can always transplant them in the spring (after frost) outside.  
Thinking about buying a plant next year?  First see if you have a friend who may grow it.  I didn't buy either of my plants.  I got one from my sister-in-law who lives four hours away.  Once I smelled the plant, I knew I wanted one too.  So, I cut some branches and wrapped them in damp paper towel and put them in a baggie.  When we got home, I put the cuttings in some water until they rooted and then planted them.  You can see the results in the first three peppermint pictures above.  The chocolate mint came from a friend's herb garden from their tea house.  Lovely...

Vanilla Mint Medley Blend

Since it's the holiday season, here's a delicious tea blend that everyone will enjoyIt's so simple and if you package up some and put it in a vintage tin; it'll be a great stocking stuffer.
I made a blend of Vanilla Black Tea, Pure Peppermint, and Chocolate Mint.  Simply use 2 parts of black tea to 1 part of mint. (1 part means 1 tsp or 1 cup. It's only a ratio to measure your tea with...one teaspoon of peppermint to 2 tsp of vanilla tea.) This way the mint won't be too overpowering for the tea.  Not only is the peppermint good for your body, the black tea has its own health benefits as well.  After all, I drink tea not only as medicine, but because it tastes so good.  This tastes pretty close to a peppermint patty in a cup, so  you, your friends and family will love it!


Well, sit back and enjoy a cup of peppermint tea or the Vanilla Mint Medley.  It not only tastes wonderful, it's great for you too.

If you don't have your own peppermint, you can find it at Mountain Rose Herbs. Or you can buy a high quality peppermint oil and put a few drops in any tea or water to get the same healing properties.
 

Information gathered from these sources: 5 Health Benefits of Peppermint 

Want to know more about bulk tea?  Check out these posts...Bulk Loose Tea: Three Reasons Why to Buy and Reviewing My Favorite Tea Steepers

What do you use peppermint for?  Blessings!! 

Linked to these amazing blog parties! Clever Chicks Blog Hop
                                                                              

Tuesday, December 4, 2012

Five Garden Gifts A Gardener Will Love!


Since I've joined Pinterest, I've been pinning a few things here and there of gardening stuff I would really like to own or own already and would like to recommend to other gardeners.  So, here's just a short list of some pretty nifty garden items that are sure to put a smile on the face of your gardening friends...or yours for that matter.  You can find these items online or maybe even in some local stores around you.  They are guaranteed to help the winter months pass quickly.  So here they are in no particular order and prices start at $5.95 (plus shipping) so they fit the budget as well.


 Nitrile Garden Gloves: I have to wear gardening gloves.  After being stung by bees and pricked by thorns, they are must for me and these lightweight gloves are tough in the garden.  Featuring a nylon glove with a coating of flexible, puncture-resistant nitrile coating, they are also water resistant and great for weeding and pruning but gentle enough for planting and sowing medium to large seeds. I own several pairs of these and absolutely love them.  They are the best gloves that I've found for general garden work. (Stick to leather work gloves for heavy duty work.) Easy to clean, I throw them in the washer and hang up to dry. They come in seven different colors and we all have different colored gloves so we all know who owns what.  I have a pink pair to help discourage teenage boys from swiping!  You may find these locally...I know we have a garden center that carries them in the summer but if not you can find them here.  At $5.95 (+ shipping) a pair, you can afford one for a friend and one for yourself.  Accept no cheap substitutes, these gloves are nice.


  Pocket Pruners:  Pruners are a must around herbs and flowers.  They are perfect for cleaning up spent plants and harvesting fresh basil.  I have an inexpensive pair that I've owned for years but now need to replace.  This pair is definitely on my Christmas list this year.  Pocket sized and handy for small garden jobs - these pruners at $9.95 fit the bill.  A great stocking stuffer too.  I'm asking for the orange pruners (they come in green too) so I can spot them easily in the grass.  I have a habit of laying them down for a minute and spending five more minutes trying to find them again!  You can find these pruners here.


 Garden Journal: After all the hard work with pruning and cleaning up outside in spring, a garden journal is a great way to relax and reflect on everything you're growing. And when given as a gift at Christmas it's a great time to dream of next year's garden as well.  This one caught my eye and is on my garden wish list.  Filled with black and white drawings and garden sayings, it's perfect for inspiration.  You can purchase this journal for $9.95  here.


 Tubtrug: Who doesn't need a handy bucket to move soil, carry clippings, transport produce and bring in flowers?  This trug does the trick and is on my wishlist for Christmas.  It also has a 5 star rating with over a thousand reviews.  This sounds very tempting to me as well as the sale price of $12.49 for an 11 gallon size.  The fact that it's collapsible is a huge bonus for a gardener like me with a very small space.  This could be used inside the home as well and you can find them here.


Weather Station:  You know you're a hard-core gardener when the weather channel is one of your top 3 TV stations to watch.  Weather and gardening go hand in hand and that's why this nifty little weather station gives you instant gratification.  These stations range in price.  Ours is a bit fancier with a barometer included but this one will get you started with temps, time and humidity.  It's price tag of $19.51 won't break the bank either.  We've had ours (a Christmas gift) for a number of years and I really like the La Crosse brand as it's proven itself accurate and reliable.  You can find this model and many others here. 

Well, I've made my list and checked it twice and these items not only are super helpful in the garden and home; they also make gardening work a little more enjoyable.

What garden items are on your Christmas wish list this year?  Blessings! 

Linked to these great blog parties...Waste Not, Want Not Wednesdays  
Frugal Days, Sustainable Ways 
Simple Lives Thursday  Wicked Good Wednesdays
Small Footprint Friday  Clever Chicks Blog Hop  
Natural Living Mondays
Homestead Revival Backyard Farming Connection  
Seasonal Celebration Wednesdays

Thursday, November 29, 2012

Savoring the Last Flowers of Fall...


I know that the Christmas season is here, but taking advantage of the last few days of November, I wanted to share a few remaining flowers of fall.
Putting two favorites of mine together, flowers and now photography...I had fun messing around with filters and textures on these photos I managed to take in early November.  It's a snapshot like these that increase our appreciation for something as simple as Sweet Alyssum.  It gets its name from the amazing scent of this almost plain flower.  A picture can almost help you to "capture" its delicious aroma and revisit the summer again.  
Alyssum is a staple flower in my garden and pots.  It's not much by itself, but en masse creates a lovely snowscape that often helps to showcase a more flamboyant flower.   
 

What could be much sweeter than bringing in a beautiful bouquet to relish the remnants of a season past?  It's no rose but I love the personality of these marigolds.  Lively and robust, they are faithful in late fall to provide plenty of blooms for the last of the scavenging bees
and bug-free bouquets to appreciate more fully after the growing season.  Using a variety of filters and a texture courtesy of Kim Klassen, these marigolds are transformed into a real-life canvas.
 

One last photo to leave you with as we enter the world of poinsettias and pine...these pictures
will definitely inspire me when February/March come around.


What will you miss most about the fall?


Linked to these amazing blog hops...

Farmgirl Friday Farm Hop  Weekly Top Shot  
Lisa Leonard   
Homestead Revival  
Frugal Days, Sustainable Ways

Tuesday, November 27, 2012

Epson Salt: A Must-Have for Home and Garden


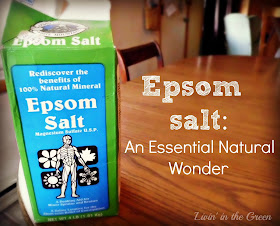
Epsom "Salt"...not really a salt at all but two minerals that our body actually uses and needs.  "Epsom salt is made up of magnesium and sulfate, which can help improve health in numerous ways. A lack of magnesium—which helps regulate the activity of more than 300 enzymes in the body—can contribute to high blood pressure, hyperactivity, heart problems and other health issues, doctors warn. Sulfate is essential for many biological processes, helping to flush toxins and helping form proteins in joints, brain tissue and mucin proteins."  - Epson Salt Council

Wow.  Pretty amazing for such a humble crystalline substance.  But this drugstore wonder is full of surprises.  It's great as a hair conditioner, sore achy muscles, and even as a garden fertilizer?! Yes, it's true...and there's even more...


When I was growing up, we had wood floors in our house.  The upstairs floorboards had a few rough spots in them but we being kids, didn't seem to notice.  Wood floors made a nice skating rink which we would skate on with socks.  One time though, I skated on some rough "ice" and promptly got a LARGE wood splinter in my foot.  Yuck.  I was horrified and did NOT want my parents to touch it.  The splinter itself was not willing to come out either, so in came the Epsom Salt.  Now, when you're a kid faced with a probing knife to extract a splinter, soaking your foot in some nice warm water was a perfect way to make me relax.  My parents loved me, but a spa experience was not what they had in mind, but rather a way to draw the splinter out of my skin and Epsom came through!  By the time my foot was done soaking, the splinter came out lickity-split (much to my surprise) and relatively pain-free.  So, Epsom salt saved the day and was my hero.  


As soon as I got married, I purchased my own carton (they sell it in bags now...way better idea!) and kept it for emergencies.  We seem to use it for any foot problems, probably because of my previous memory of it, but it does SO much more!  Even the carton I have only lists a few of its many uses.  Here's just a few: eliminates toxins by exfoliating and taking a bath in it - 2 cups in the tub, helps with athlete's feet and toe fungus (see, it likes feet), cleans bathroom tiles - use equal parts of Epsom with dish detergent to clean, is a fertilizer for houseplants and vegetables/flowers*, relieves constipation (!) and much more!!  I will admit my experience with it is limited to the sliver incident (which by the way, is another thing on the list it does) and foot complaints...but it did a great job in these areas.  However, after writing this post, I am going to be sprinkling my Epsom salt on all my houseplants!  


Here's another great bonus for Epsom Salt...you can buy it at the drugstore.  No health stores, no fancy catalogs, no shipping charges; perfect.  I love the simplicity of these types of home remedies and garden helps.  After all, isn't that part of living simply?
So, if you don't have some Epsom Salt at home; run to the nearest Walgreen's, pick up a bag and "skate" on your wood floors with a smile on your face...ahhhh.

Have you used Epsom Salt before? How and why did you use it?

Here's a few great links to more information on Epsom Salt and how to use it:

Epsom Salt Council  
15 Unknown Uses for Epsom Salt at Gomestic.com


*For houseplants: Sprinkle Epsom salt weekly once to nourish your houseplants, flowers and vegetables.

Linked to these amazing blog hops: Waste Not, Want Not Wednesdays  
Frugal Days: Sustainable Ways
Small Footprint Friday

Simple Lives Thursday  Clever Chicks Blog Hop
Homestead Revival 


Warm the mixture of equal amounts of conditioner and Epsom salt for 15 seconds. Apply this mixture through your hair from scalp to end; leave it for 15 minutes. Rinse with warm water; you can observe the natural glow in your hair.

Read more: http://gomestic.com/homemaking/15-unknown-uses-for-epsom-salt/#ixzz2DT7hhILh